
Happy Birthday Ally!
I hope you have a wonderful Birthday.
I thought I’d put together a page of resources to help you with your new Quadcopter kit!
Quadcopter terms:
FPV : First Person View
ESC: Electronic Speed Controller - Controls the speed of the motors.
FC: Flight Controller - The “motherboard” which does all the smart stuff.
PDB: Power Distribution Board
VTX: Video Transmitter
RTX: Video Receiver
OSD: On Screen Display
(A)RTF: (Almost) Ready to Fly
Your Quadcopter Kit
The build I have put together is based on the following kit from www.quadcopters.co.uk. I have highlighted the parts that differ from this kit!
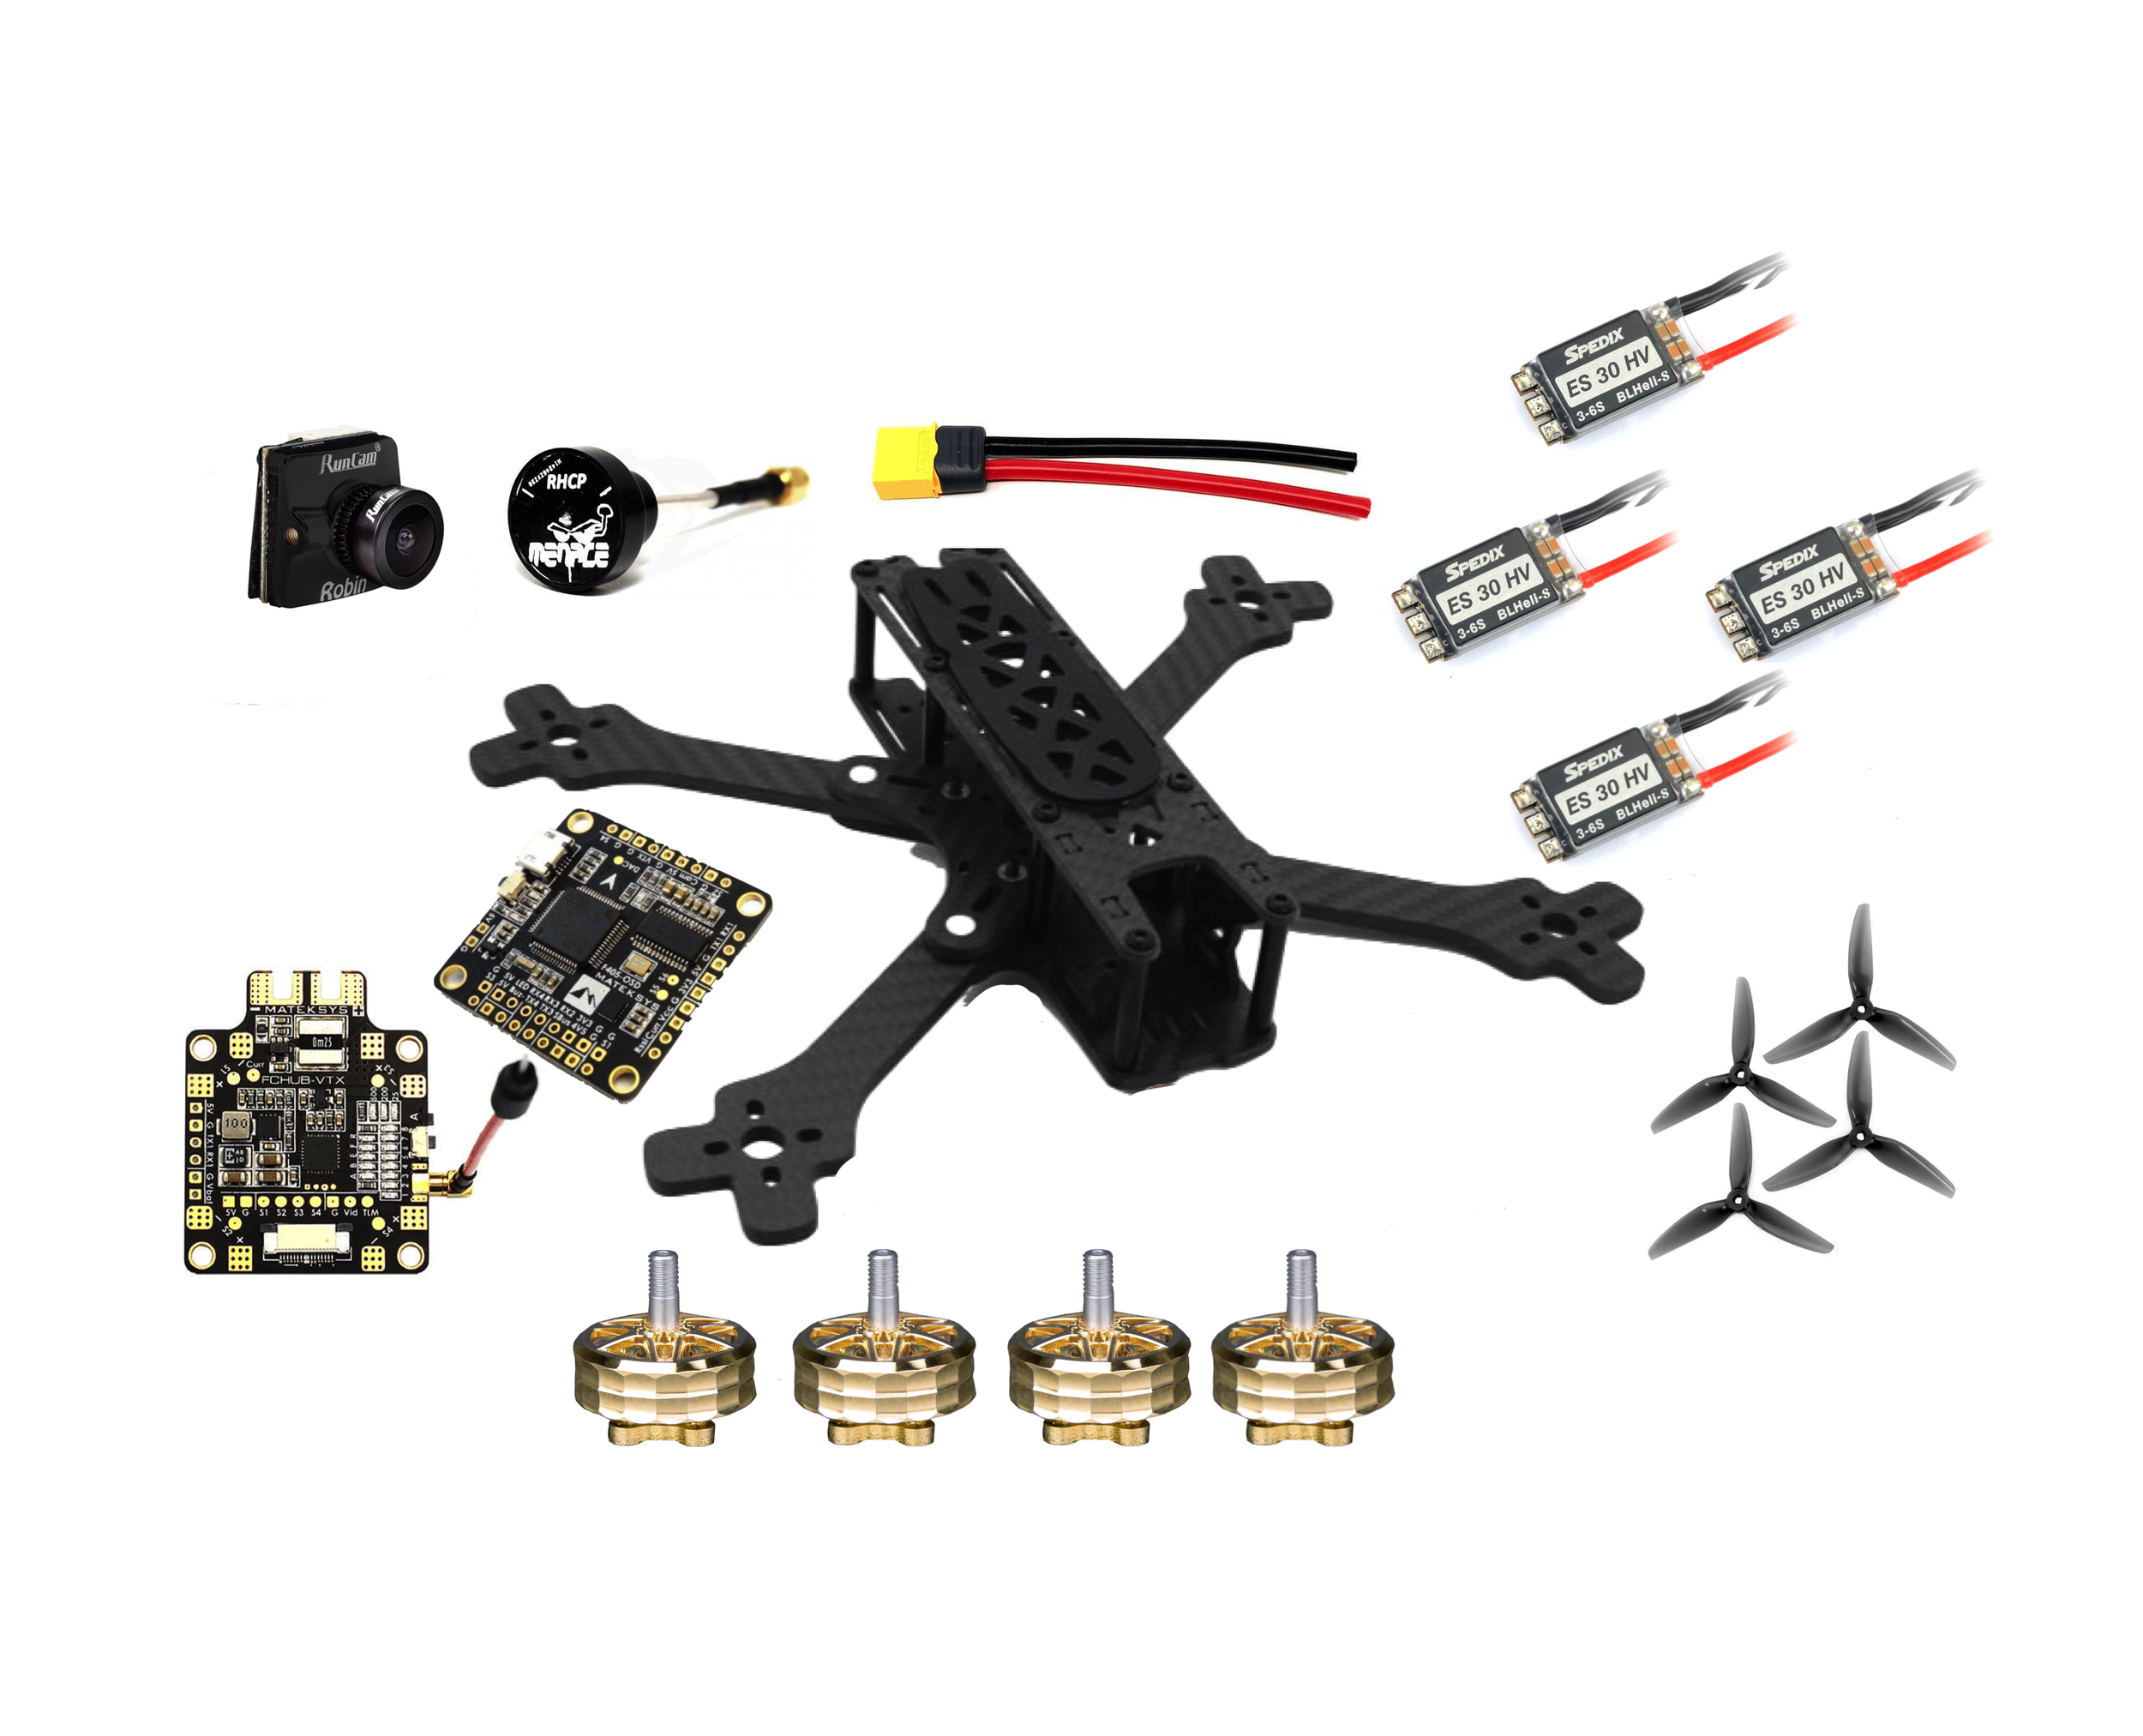
Note: Your kit will be a little different than this!
Build Your Own Freestyle Quad (KIT)
The kits we put together are using premium products but at an affordable price to get you started with freestyle drones. We also only supply these kits with genuine TBS Source one frames supplied by Team Black Sheep to be assured of quality.
The Motors, FC, and ESC's are also high quality which are not only designed to last but will perform.
Over the years many people bought RTF drones only to be let down when parts are no longer available or compatible, so with this kit we aim to make a change as well as teach you a thing or two, and in our opinion build a better machine. When it comes to a first build people usually don't want to spend a whole lot of money so we compiled this kit using some our budget friendly stock.
Building your own drone can be very rewarding, and it's not as hard as it use to be "back in the day", You can be up and flying in no time and the stock settings on Betaflight work great. Not only that but should you break anything (and you will) you can easily replace that broken part OR upgrade it to something else, and that's another bonus of self building instead of a locked down RTF.
Frame:
Lets face it, we all crash, it's just a part of FPV and it happens more that you think, so you want a frame that is readily available and affordable, so we chose the TBS Source One frame. This frame was designed by the community for the community and the price and performance reflects that.
Note: Supplied with a Source Two instead. I think it’s mostly the same!
Motors:
We chose the T-Motor Velox not only for the stunning looks but these perform amazingly well . Available in 1950kv 6S or 2550kv 4s both are the perfect KV for freestyle.
Changed to: Emax Pulsar Motor with Led 2306 (1700kv)
ESC's
We chose SPEDIX ES30A 3-6S with Blheli_S, another quality part that is totally reliable and used in a lot of our customers builds. Wiring the ESC's is simple and we chose individual ESC's over a 4in1 so that in the event of a breakage you can easily and quickly swap it out for another without having to fork out for a whole 4in1.
Changed to: Spedix 4 in 1 IS30A Dshot 600 BlHeli_S Esc
FC/PDB/VTX
So this is your first build and we want to keep things as simple as possible. For that reason we chose this great combo flight controller-Power distribution board-Video transmitter. The FC is the Matek 405 STD as used in our fully fledged RTF Builds running BetaFlight. The FC is connected to the PDB with a ribbon cable that carries all the important information down to the ESC's. The PDB is the Matek FCHUB VTX. Not only is this a great PDB but it also has a built in VTX (video transmitter) capable of 25mW to 500mW to broadcast your camera's video back to a set of goggles or monitor.
Camera:
Runcam have been around from almost the start and they know how to make a great camera. For this build we chose the Runcam Robin. This camera is a good all rounder with great WDR (wide dynamic range) keeping your view clear when flying around in challenging lighting conditions.
Changed to: Runcam Racer 2
Antenna:
Antennas are very important to send your video wirelessly to you on the ground, they also need to be very tough to withstand crashes at 70mph or more. We have found the menace raptors to give the best bang for buck when it comes to both of these factors and they just so happen to come in at a great price point.
Other bits:
We also include a set of props to get you in the air, you should look at props as a consumable (like tyre's on a car) they are going to get worn and need replacing regularly, so each kit contains a set of the best HQ props on the market. You will also get and XT60 battery connector to power the quad, a battery strap and some 60/40 soldering wire.
What you need:
1 x lipo battery (4cell is recommended)
Battery: Tattu Funfly Lipo Battery 1550mAh 14.8V 100C 4S1P
1 x Lipo Charger
Charger: Betafpv USB 1S HV lipo charger
If flying FPV you will want a set of goggles or a screen. The most budget friendly option are the Fatshark Recons.
1 x Soldering Iron and Solder (we include some good 60/40)
So start your journey today with a future proof drone.
3D Printed Parts
The good thing about the TBS Source frame being popular is that there’s a bunch of 3D printed parts available for it!
TBS Source Two GitHub (with 3D printed parts)
TBS Source Two on Thingiverse
Some of these TBS Source One Accessories should work with the Two such as the arm guards.
Building your Quadcopter
The following are some videos that I’d recommend to get you started. They’re not the same kit as above, but the concepts on how to put it together carries over. Remember our VTX is built into the PDB.
Other Resources:
Here’s a good break-down of a similar build:
FPV Budget Build
Wiring Diagrams for the FC:
Matek F405
Software
So, the quadcopter is built and ready (hopefully). Now it’s time to get the dang thing in the air. The FC in your build is setup to work with software called Betaflight.
Here’s where you can download the Betaflight Configurator:
I recommend these videos on how to install, set up and use Betaflight:
[VIDEO] – Installing Betaflight Configurator
[VIDEO] – Installing Betaflight Drivers
[VIDEO] – Connect a Flight Controller to Betaflight
FPV Viewing Software
EasyCap Recorder Pro for Android
Legal Stuff
Drones: how to fly them safely and legally